Monday, November 26, 2007
So Much to Do, So Little Time!
I guess we all feel this way this time of year. Now that Thanksgiving is over and my DT application is submitted I'm looking at the list of things I need to get done in the next month and I'm thinking I need to make a plan or I'll never get it all accomplished. Today was grocery shopping day and tomorrow I desperately need to clean house. I can then begin to concentrate on all my projects. Last year I made photo calendars for both girls and they loved them so I thought I'd make them again this year. I need a day to sort photos to go on those and then a week or so on each one. I also have our annual calendar to complete but I usually end up just get January and February complete and then do the rest as I find time in January. Then there's the Christmas cards. I made homemade cards last year and plan to do the same again this year. I also do a newsletter to go in the cards each year. I've purchased the paper and envelopes for that and hopefully will get that started by the weekend. Each year all the women from church plan a party at someone's house for a gift exchange for which we are to bring a homemade gift. I'm considering doing a planner for my homemade gift and use my zutter to bind it all together. Hopefully I can find some pre-made pages I can print off and put together in a book. If not I'll be working overtime on the computer composing my own pages for this. It's getting harder each year to buy for the kids. They are at the point now where they have their own jobs and buy things when they want them. So, trying to find a unique gift to surprise them with is getting tough. I keep looking at the sales papers and hoping that something will hit me as the perfect gift for one of them but I'm drawing a blank so far. Usually there is one "big" item they request but this year they don't even know what they want. This santa job isn't easy. I'm off to the gym now to work off the stress and formulate a plan.
Saturday, November 24, 2007
Wish Me Luck
I've just sent in my first submission for a design team. My friend, Melanie, made me do it. She's been telling me for two years that I need to submit to magazines and when I told her about this Design Team opening she made me promise to send something. I've spent the past month working on the layouts for the November 26 deadline. It was a nice challenge for me to use some of my new stamp sets with the objective of showcasing as many different stamps as possible. I have now fulfilled my promise to Melanie. Nicky and Diane have also been urging me to submit layouts too so hopefully this will make them happy as well.
We had a great Thanksgiving. We went to a friends' house with several other families and had a big meal together. I think this is my first year not cooking (other than our move in day to our new home in England on Thanksgiving 2000). I've cooked every year since I got married. I really enjoyed having a break. I just had to make pies this year. I took two pumpkin and two chocolate cream pies for the meal. The weather finally turned cold this week and we have a fire in the fireplace tonight. We got a few inches of snow on Tuesday night/Wednesday morning.
Now that my DT application is in, I need to get busy on Christmas presents (calendars) and Christmas cards. It's time to write my yearly newsletter. I guess next week we will put up the Christmas decorations. Wow, this year sure has flown by.
Thursday, November 22, 2007
Happy Thanksgiving
Happy Thanksgiving to all my friends and family. We will be spending our day with some friends and this will be the first year in a long time that I have not cooked on Thanksgiving. I've just finished making my homemade pumpkin pies and chocolate cream pies (for Hannah). We are really missing Amber this year. It's not the same without the whole gang here. She is spending her week with my niece in Georgia. I'll have to eat some pie for her.
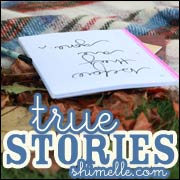
Here are a few more layouts for my scrapping friends who come and check to see my latest work.
This is a page about my daughter Hannah. I had done a similar page about Amber when she turned 17 for one of my classes and I didn't want Hannah to think that I love Amber more than her. I always worry about something happening to me and the kids counting up my layouts and finding I have done more of one child than another. I try to keep things equal for them. The title for this was done with my cricut. The cartridge was opposites attract. The journaling blocks are from my new favorite stamps called "See D's" stamps by Inque Boutique. I love them because the come already cut out for you. You just pull them apart from the plastic they were cut from. They come with a mat for stamping and restickable adhesive one them for mounting on blocks, and my favorite thing is that they have the design printed on the back of them so that when you are stamping you can line them up easily. I've always liked clear stamps because you can see where you're stamping but they lose their cling and stain very easily. I've always preferred the rubber stamps because of the detail that they allow. So these stamps give me all the things I want in a stamp set without having to buy anything extra. They even have their own CD cases to store them in. The best thing yet is that they are priced lower than most stamps so I can go crazy buying more. These particular stamps are fun because they look like an old notebook page. I stamped the words on them with a new alphabet stamp set that I got from a Japanese vendor at a local trade show. Wish I would have bought a few of his other fonts now because I love these stamps as well. What can I say, I'm a stampaholic. I keep bugging the local scrapbook stores to get more of these See D's stamps. I saw a nice selection of them when I took my daughter to Fla for college and had to limit my purchases because of time constraints. I was thrilled when they started getting them here. They are now calling me when they get new ones in so I can check them out first since they know I'm so excited about them.
 This is a simple page. One of the simplest I've ever done actually. My daughter took this picture of herself last spring from college and I loved the picture. It called to me for an enlarged one photo page. Then I was called to come and work in the store for a few days and they had just received these transparency overlays by Fancy Pants (I believe) and it said "Bloom where you are planted" and I said...."This is what I need for that picture. So I picked out a background paper, put the picture in the center and popped the overlay on top and I was done but it all just seemed to go together perfectly. I almost felt guilty for doing something so easy but nothing else was needed to complete the page.
 One of our cats, Gizmo, got sick over the summer and had to spend almost a week at the vets. He is Hannah's kitty and they are best friends. He follows her everywhere and loves to jump in her lap and give her hugs whenever she sits down. He got depressed while at the vets and I told them it was because he is such a "people" kitty and needed his family. We went and spent an evening with him and the top picture of the small photos is of him hugging Hannah when he finally got to see her. I saw the idea for this page from the crafttvweekly webisode by Tricia Morris from Club Scrap. It's a waterfall page and you pull the tab at the bottom and it flips up the other pictures so you can see them all. I had fun putting this page together when I was attending a Club Scrap weekend retreat and Tricia came to the crop and checked it for me. I borrowed the quote stamp from one of the girls attending the crop who was sharing her Club Scrap stamps.
 Here's how the page looks when the tab is pulled to flip up the other photos. The quote stamp reads "To be loved is to live forever in someone's heart." Stamped on each of the flip up pictures is "Best Friends from the start". They have such a unique relationship that it needed to be documented. She was pretty sad when he was at the vets for so long and we were all missing him that week. We also have his sister who is Amber's kitty and she is much smaller and keeps to herself more than he does. She loves music though and follows Russ through the house anytime he starts whistling. It's funny to watch how he can call her inside just by whistling and can get her to come and sit in his lap if he whistles.
 This page is a scraplifted page from my UK friend, Anne Perry. Several of my friends work for the British magazine "Scrapbook Inspirations" and I grab a copy of the magazine whenever I'm in the bookstore just so I can see some of their latest work. One similar to this was published in the magazine by Anne and I loved it and couldn't wait to use the idea. I made the page for the store for one of the crops. It was funny to see all the complaints about having to sew on a page. Once they did it though they were so happy with their pages. Thanks Anne for the page idea. You always inspire me with your work. It's so much fun to pick up that magazine and see so many of my British friends' faces all through it. Who knew I was hanging out with all the up and coming stars of the British scrapping world. (For those of you that don't know, I lived in England for four years and Germany for 1 year as the scrapbooking craze was beginning there and I watched it bloom into quite a booming industry. I had many weekend crops with the pioneers of the scrapping craze in the UK and I've learned a lot from many of them as our styles evolved together). That's all for tonight. I need to get some sleep for the big holiday meal tomorrow.
Here are a few more layouts for my scrapping friends who come and check to see my latest work.

This is a page about my daughter Hannah. I had done a similar page about Amber when she turned 17 for one of my classes and I didn't want Hannah to think that I love Amber more than her. I always worry about something happening to me and the kids counting up my layouts and finding I have done more of one child than another. I try to keep things equal for them. The title for this was done with my cricut. The cartridge was opposites attract. The journaling blocks are from my new favorite stamps called "See D's" stamps by Inque Boutique. I love them because the come already cut out for you. You just pull them apart from the plastic they were cut from. They come with a mat for stamping and restickable adhesive one them for mounting on blocks, and my favorite thing is that they have the design printed on the back of them so that when you are stamping you can line them up easily. I've always liked clear stamps because you can see where you're stamping but they lose their cling and stain very easily. I've always preferred the rubber stamps because of the detail that they allow. So these stamps give me all the things I want in a stamp set without having to buy anything extra. They even have their own CD cases to store them in. The best thing yet is that they are priced lower than most stamps so I can go crazy buying more. These particular stamps are fun because they look like an old notebook page. I stamped the words on them with a new alphabet stamp set that I got from a Japanese vendor at a local trade show. Wish I would have bought a few of his other fonts now because I love these stamps as well. What can I say, I'm a stampaholic. I keep bugging the local scrapbook stores to get more of these See D's stamps. I saw a nice selection of them when I took my daughter to Fla for college and had to limit my purchases because of time constraints. I was thrilled when they started getting them here. They are now calling me when they get new ones in so I can check them out first since they know I'm so excited about them.
 This is a simple page. One of the simplest I've ever done actually. My daughter took this picture of herself last spring from college and I loved the picture. It called to me for an enlarged one photo page. Then I was called to come and work in the store for a few days and they had just received these transparency overlays by Fancy Pants (I believe) and it said "Bloom where you are planted" and I said...."This is what I need for that picture. So I picked out a background paper, put the picture in the center and popped the overlay on top and I was done but it all just seemed to go together perfectly. I almost felt guilty for doing something so easy but nothing else was needed to complete the page.
 One of our cats, Gizmo, got sick over the summer and had to spend almost a week at the vets. He is Hannah's kitty and they are best friends. He follows her everywhere and loves to jump in her lap and give her hugs whenever she sits down. He got depressed while at the vets and I told them it was because he is such a "people" kitty and needed his family. We went and spent an evening with him and the top picture of the small photos is of him hugging Hannah when he finally got to see her. I saw the idea for this page from the crafttvweekly webisode by Tricia Morris from Club Scrap. It's a waterfall page and you pull the tab at the bottom and it flips up the other pictures so you can see them all. I had fun putting this page together when I was attending a Club Scrap weekend retreat and Tricia came to the crop and checked it for me. I borrowed the quote stamp from one of the girls attending the crop who was sharing her Club Scrap stamps.
 Here's how the page looks when the tab is pulled to flip up the other photos. The quote stamp reads "To be loved is to live forever in someone's heart." Stamped on each of the flip up pictures is "Best Friends from the start". They have such a unique relationship that it needed to be documented. She was pretty sad when he was at the vets for so long and we were all missing him that week. We also have his sister who is Amber's kitty and she is much smaller and keeps to herself more than he does. She loves music though and follows Russ through the house anytime he starts whistling. It's funny to watch how he can call her inside just by whistling and can get her to come and sit in his lap if he whistles.
 This page is a scraplifted page from my UK friend, Anne Perry. Several of my friends work for the British magazine "Scrapbook Inspirations" and I grab a copy of the magazine whenever I'm in the bookstore just so I can see some of their latest work. One similar to this was published in the magazine by Anne and I loved it and couldn't wait to use the idea. I made the page for the store for one of the crops. It was funny to see all the complaints about having to sew on a page. Once they did it though they were so happy with their pages. Thanks Anne for the page idea. You always inspire me with your work. It's so much fun to pick up that magazine and see so many of my British friends' faces all through it. Who knew I was hanging out with all the up and coming stars of the British scrapping world. (For those of you that don't know, I lived in England for four years and Germany for 1 year as the scrapbooking craze was beginning there and I watched it bloom into quite a booming industry. I had many weekend crops with the pioneers of the scrapping craze in the UK and I've learned a lot from many of them as our styles evolved together). That's all for tonight. I need to get some sleep for the big holiday meal tomorrow.
Tuesday, November 20, 2007
More Pages to Share
 This is a page from my "Book of Me". I wanted to use my flexible ruler and try out some waves. The journaling was all done on computer so the page went together fairly quickly. Was a little tricky getting the curves the way I wanted them. The title is done with "thickers" letter stickers. Was fun to do a simpler page for once. Helped me get out of a scrapper's block phase. The journaling lists some of the things I've learned in my life so far. Oprah always asks guests on her show. "what do you know for sure" so I wanted to use that theme for this page. It took me several days of thinking to come up with my list of points for the page but I'm happy with the results.
 This is another page that was done for the store. We had just gotten in the mica glitters and they wanted me to do something with them. I cut letters out of the double sided sticker paper with my big shot and peeled off the top. Then I rubbed the glitter on the letters. I used my CM curvy cutter to cut out the picture tops so that they flowed across the page. For the flower centers I put a dot of diamond glaze and then sprinkled glitter on it and let it dry. My kids and their friends love playing with their cameras and I've gotten some of the best "funny face" shots of each of them. They make me smile to see them having fun.

These are two of the fall pages I did for a class in my home. They completed four fall pages in the evening. I'm trying to get them comfortable with stamping. They always complain when they are doing the pages but then love the results at the end.
 The same group of ladies also requested a winter/holiday class so this is one of the pages I created for this class. I used the Heidi Swap masks to do the title. I made them do a little sewing on this one. We also used my label maker and fed strips of vellum through it to do the journaling strips. It gave it a softer snowy kind of look. The paper is Basic Grey. The lower photo is mounted on a file folder mat that was cut from the coluzzle template. I used the Heidi Swap date stamp to stamp the date on the tab. The pictures are from our Christmas trip to Scotland in 2003. The kids and Russ all got into a snowball fight.
 Another page from the winter class. They wanted to use some of their Christmas prints on a page so I tried to use several different patterned papers to help them learn to use patterned papers. On the background cardstock I had them us a background crackle stamp to give it a little design to. The Holiday part of the title is stamped with my Penny Black stamps. The rest of the title was cut from sizzix dies. The file folder at the bottom contains some of our favorite holiday recipes with a stamp on each recipe card. I wanted to show them how to preserve some of their favorite recipes right on their pages for future generations. I used the notch punch from Basic Grey to make a notch to hold the file folder closed so the recipes didn't fall out.
  This is the third page from the holiday class. They had been asking for pages where they could fit more photos on the page. I resized a bunch of our holiday photos into 2 x 2 size and circled them around the page. I printed the title strips on the computer for each of the students and then gave them chipboard letters to trace for the word "home". There are brads in the corners of the title. On the second page, I made the larger photo mat hinged so that I could type journaling behind the picture. I wanted to show them how to still fit journaling on a page that has a lot of pictures on it. I fit 21 pictures on the page total. They were thrilled to have a page that they could use a larger chunk of their holiday photos on and summarize the year's festivities.
Wednesday, November 14, 2007
Pages of Life in General
 This is a page I did for the store I worked at for one of their crops. My two girls became good friends once they grew up and I wanted to record that special bond they have in my books so that they can look back and remember. They are both hams for the camera and I have a lot of pictures of them that they've taken themselves holding the camera at arms length. They like to try different faces and just have fun playing with the camera which makes me happy because it gives me plenty of scrapable pictures. This page uses a combination of stamping and quickutz. The stamps used in the journaling strips is by Penny Black and one of my tried and true faves. The stamps on the bottom and in the title circle are Rhonna Farrer stamps by Autumn Leaves. The quickutz fonts are metro mini and Abigail ( I think). Flowers are made with a punch and then strips of paper for stems and strips tied in knots for the leaves. Stamps for the names/year are Image Tree lower case and numbers. (another well loved set of stamps).
 This is another page done for the store for a crop. These are done to give the customers ideas and to show them how to use tools and items in the store. I used letter stickers to make a mask and inked around them and then pulled them off for the title. I used a distressing blade to rough up the edges around the title. I put a pocket behind the middle picture on the bottom for journaling and showed my son's sunburned face after the day of hiking with no sunscreen. I sewed on the journaling strips with general information about the climb and how long it took. As you've seen in so many of my pages, I love to stamp with my alphabet stamps. I used the Image Tree set again for the blocks and a set. I can't remember who makes the round set. I'm thinking it was a hobby lobby brand (maybe paperarts). I CM curvy cutter was used for the top of the lower pictures to similate mountain peaks and valleys.
 This is one of the first layouts I did for the store for a military class I was teaching. It showcases all the homes we've lived in around the world with all our moves. Across the top I printed long strips with how many cities, countries, and houses I've lived in. Underneath each picture shows the location of each home. The title block uses foam stamps for the bigger words "Home Is" and then I used my image tree stamps to stamp "where the military sends me". The houses on the sides are a quickutz die. I put brads between each bullet point on the top and bottom strips and then brads on the corners of the title block. This was a popular page in the store for quite awhile.
 This was a page created for some of my home scrapbook classes. They wanted to do summer pages so this is what I came up with. The title is quickutz Katie font. The first letter of each word was highlighted with a rectangle with the sides cut in. The sun is done with a circle punch and triangle eyelets around the edges with a round paper clip in the center. The journaling across the bottom is using my Image Tree stamps again with yellow eyelets in between each topic. I wanted to show them how to do a slanted layout.
They were funny when I was trying to teach them how it's done. As soon as they "got it", you'd hear a big OHHHHH! that wasn't so hard.
The pictures are of my husband and I on our trip to take our daughter to college in Fla.
 This is another page done for my home scrapbook classes. I have a group of ladies who call me seasonally to do a class. This was our summer class where they did four layouts with summer themes. In this one I taught them to do a circle layout. I think I could do a commercial for the Image Tree stamps because I use them all the time. We stamped the journaling around the circle. The title stamps are from Autumn Leaves. Stamped on coordinating papers and cut out. I used the Curvy Cutter from EK Success for the circle. The challenge is finding the right photos with a lot of sky area that can be curved in for the circle without cutting off heads. These are pictures of my three kids and my son's ex-girlfriend from several years ago.
 This is another page from the summer class I taught from my home. These are pictures of my first great nephew, Karson. It's purpose was to show them how to use several different patterned papers on their pages. I used the Heidi Swapp chipboard letters for the title with a series of three brads at the top of the strip. His name was added using the file tab punch from McGill. The corners were rounded on the papers since there was a circular feel going on in the pictures. Since the ladies are making four layouts in a night they have to be fairly simple to put together but I always try to get them to try something new that they might not try on their own.
More Heritage Layouts
 This is the cover page of my book. I printed the pictures on gray bazzill cardstock and then sanded them and inked them with distress inks to age them. The quote is a sticker. Inside each of the flowers I printed the two surnames of my parents and then put a key ring around them and filled them with diamond glaze. The quote reads " I have looked at photographs that show you as a CHILD --when you were MARRIED--as a parent. Such brief and limited STORY they tell. I wish I could ask how you weathered disappointments, what were your greatest JOYS, and what you felt to be TRUE. What I know is you are a part of me, and I find PEACE knowing you've gone BEFORE me. " I thought that was perfect for the start of my book.
These are pages of my Great Grandparents on my mother's side. These were photos that I borrowed from my mom and scanned. Once I printed them, they needed to be aged again so they would look older. I cleaned up the scratches on the photos before I printed them and then used Tim Holtz Distressing inks to distress them. I tore out a section of the first page and put the journaling inside the hole. This gave the look of torn wallpaper. The title font is quickutz Eliza.

This is a layout about my grandfather. The photo is done with photo transfer using clear contact paper. The picture in the top corner is my sister and I with one of his watermelons. One of my favorite memories of visiting my grandpa was to hunt for where he had the watermelon hidden in the house. He always had one there and it was usually hiding under his bed but we always searched the house before finding it. In the bottom corner is part of the words to a song that he sang to us every time we visited as we were preparing to leave. "God be with you til we meet again." I can't ever sing that song without thinking of my grandfather.
 Next is a page I did about my parents. The title on the left side reads "meet my parents". The center journaling on that page tells their names and birth/marriage dates and the death date of my dad. On each side of the flower are journaling strips with words that tell a little about what they like to do. On the other side is their love story and in the envelope I typed out the story of how they met, fell in love and how my dad proposed and then their wedding. The strips summarize where and when they met, their wedding date and how long they were married before my Dad's death. The photos are of them shortly after they married and at the bottom is one of the last photos I have of them together at my brother's wedding about seven months befor
 e he died.
This is a five generations picture of myself, my mom, grandmother, great grandmother and two great-great grandmothers. I love the look of that last photo on the right. She looks like a woman you wouldn't want to mess with. The tags tell a little about each of them and what I know about them from my mom's stories. That's all for today. Tomorrow I will share a few of my regular layouts of my kids.
Friday, November 02, 2007
Heritage Scrapping
 I thought I'd add a few more of my scrapbooking projects to my blog so some of my out of town scrapping friends can see some of my work. I will start with some of the pages from my heritage album. I haven't worked on this in awhile but back last winter/spring I got quite a bit done on it so I could use them for class samples. This is my family tree with pictures. I used DCWV Old World paper pack throughout the entire album. The stamps are by Little Davis, I think. The quote reads "Family Faces are magic mirrors. Looking at people who belong to us, we see the past, the present and the future. " The title is quickutz Eliza font.
This is Russ's family tree. It shows how to do a family tree without pictures. I don't have any pictures of Russ's family other than his parents so I thought that this would be give me a different perspective on the family tree. The font is Cricut George font.
Next is a page about a church that has some family ties to it. My Great Great Grandfather donated the land for this church to be built. The original one burned down in the early 1900's and my grandfather was among the men that helped to rebuild the church that is seen in this picture. It is no longer standing today but several of my relatives are buried in the cemetery on the lot. The place where the church used to stand is now a little lake. This page was done using the Heidi Swap masks.
 I printed the photo on Bazzill paper and sanded the edges to give it the aged look. The photo mat was crumpled inked and ironed.
Under the title is a image transfer using packing tape of my Great Great Grandfather's tombstone.

This is a page about my grandmother. The text was written by my cousin Patricia. My grandmother had alzheimers for most of my life so my memories are of her being in a different world. My cousin, however, got to know her before all of this hit and had memories of baking with her and talking to her. I wanted to include her account so I would have some picture of my grandmother. The image transfer was done using clear contact paper.

This is a page about my dad. I did this one as a timeline to show bullet highlights of his life. I have to thank my Mom for providing me all the information for this page and helping me get the chronology correct. In the pocket behind the tall photo on the first page I put more information in paragraph form of my father. I tried to pick pictures that represented different stages of his life. My Dad died in December of 1986. I truly miss him. He was quite an inspiration to me in many ways. It's late and I need to sleep so I will upload more pages tomorrow.
Subscribe to:
Posts (Atom)